Model On! is a service for finding SPICE models[1] for circuit simulation, downloading models and submitting model creation requests. Models are provided from a library consisting of models created by MoDeCH and partner component manufacturers.
Search the library for passive devices, active devices and ICs. Where a model report[2] is available, open it from the search results to review the model characteristics.
For an available model, select Add to Downloads and download it from the Download page.
For an unregistered part number, add a draft through the create-request form, then select it and submit the request.
Figure 1 shows the Model On! model library. Supported simulators, download limits and create-request allowances depend on the contract plan[3]. Check your current contract and remaining allowance on Usage history.
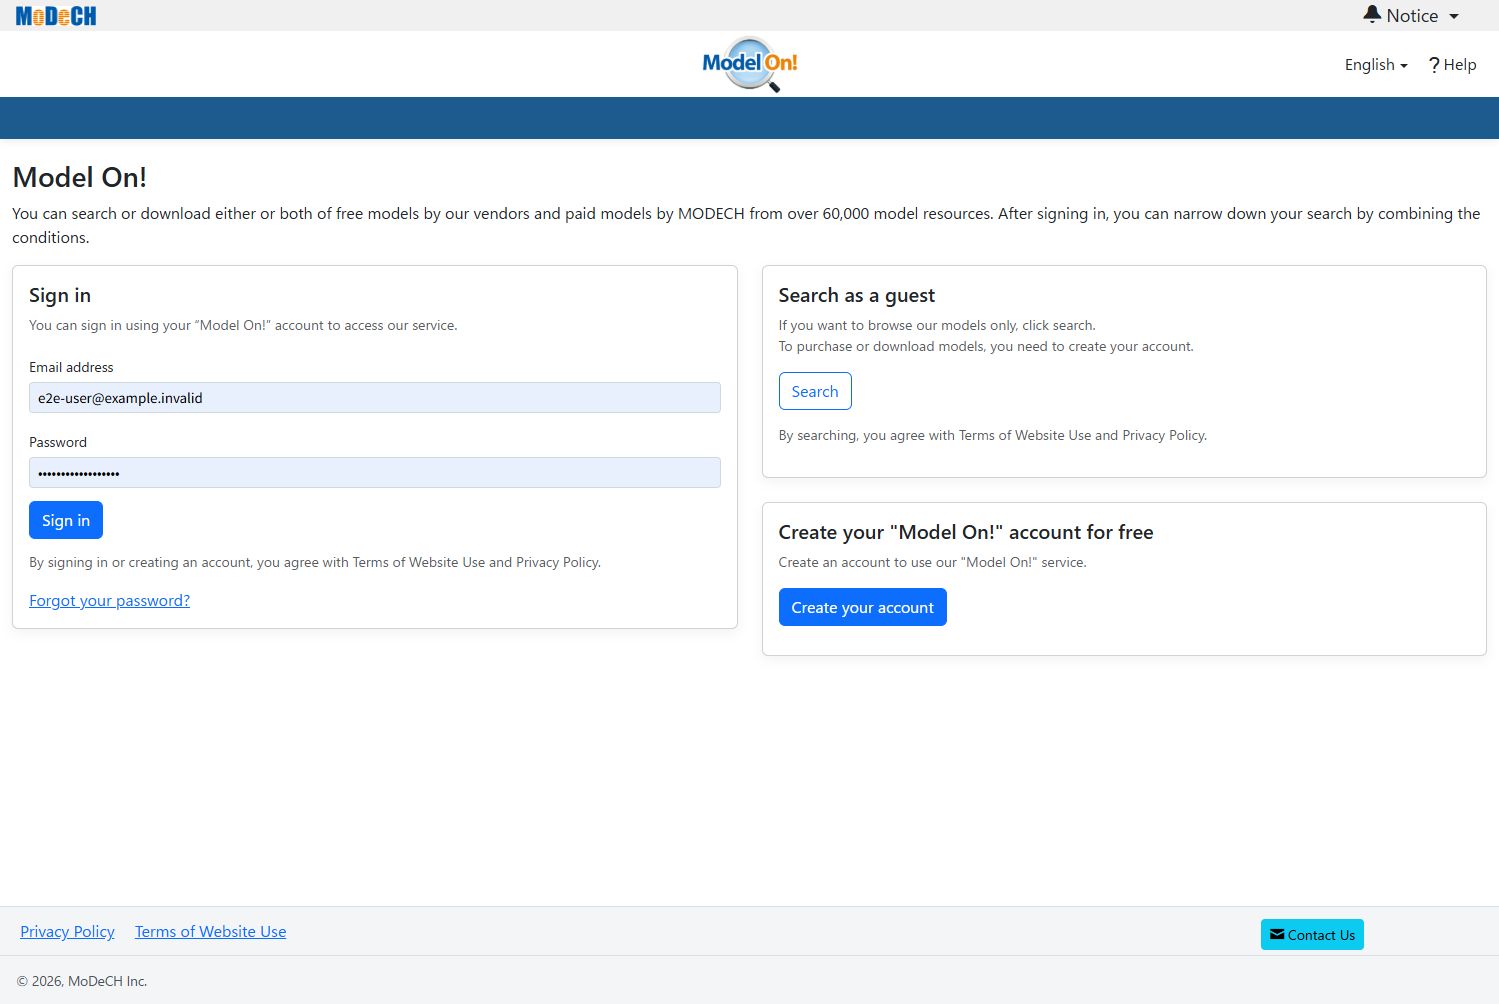
Enter your registered email address and password, then select Sign in.
If you belong to several sites[4], select the intended Site ID[4] in the header. Check the subscription[5] on Request, Usage history and Download pages.
To register, select Create your account and follow the instructions. Search as a guest lets you search for models without signing in. Open the confirmation link sent by email to complete registration. Downloads and create requests are available after signing in.
If you forget your password, select Forgot your password? and follow the reset instructions and expiry information in the email. Follow the password requirements displayed on the form. Sign out when you finish.
Figure 2 Sign-in page
3. Find a model
Search for models and refine results
Find candidates by part number or specification, then check the simulator and any available report. Add to Downloads saves your selection; obtain the files from the Download page.
Enter a part number or keyword, then select Search.
Select the models to obtain, then choose Add to Downloads.
Separate words with spaces to search for models containing every word (AND). For example, enter MOSFET 100V and press Enter or select Search.
Figure 3 Search field and results
Add to Downloads is also available beside pagination. A count button appears at the bottom when models are selected.
Filter panel example
Select Filters in the search bar to open the panel at any screen width. All five lists stay expanded. Select conditions directly; use the report options to show models with or without reports.
Available filters: device type[6], manufacturer, model type[6], simulator, provider[7] and report availability.
Figure 4 Filter conditions
The Structure and Model characteristics columns describe the classification and features of each result.
Figure 5 Review structure and model quality
4. Obtain a model
Download models
Obtain available models. Check your subscription and remaining download allowance before proceeding.
How usage is counted
Each regular model downloaded counts toward usage, including repeated downloads and downloads after changing pin assignments.
Downloading a completed request model[9] again does not use the regular download allowance.
Accepting or generating a pin-assignment change alone does not increase download usage.
Open Download and check the subscription and available quota[8].
Use the table search to find a part number and check the models to obtain.
Check the pin assignment setting in the list, then select Download. To change terminal mappings, see 9. Change pin assignments.
Save the ZIP file as instructed by your browser, then extract it and review the included report and notes.
Remove unwanted candidates only after checking the target. This removes them from your Download list; it does not delete models from the service library. The save dialog or automatic download location depends on the browser and operating system.
Check the displayed usage and remaining allowance after downloading. If the connection is interrupted, check the history and saved files before repeating an operation.
Figure 6 Download list
Use Download above the list or the count button that appears at the bottom when items are selected.
5. Request model creation
Request a model to be created
On the Request page, use the create-request form to add models to Drafts[10], then select the drafts and submit the request.
Save a create-request draft
Select the subscription and check the remaining create-request allowance.
In the create-request form below the list, enter the part number, manufacturer, simulator, request category[11] and rank[12]. Add supporting information in Comment.
Select Save as draft and confirm that the draft appears in the list above.
Saving a draft does not submit a create request.
Figure 7 Model request form
Select drafts and submit the create request
Review each draft’s part number, manufacturer, simulator, request category, rank and comment.
Check the drafts to request, then compare their total rank with the remaining allowance.
Select Submit create request. If a confirmation dialog appears, review its contents before proceeding.
Remove unwanted drafts after checking the target. If the simulator is outside your contract or the request exceeds the full-contract allowance, review the reason displayed on the page.
Select the three drafts, check that their total rank is 4, then select Submit create request.
Figure 8 Three drafts selected with a total rank of 4
Table 1 Example calculation of create-request usage
Selected model
Rank
Usage for this request
EXAMPLE-1
1
1
EXAMPLE-2
2
2
EXAMPLE-3
1
1
3 models total
4
4
In Figure 9, six rank-one IC drafts can be requested together despite a monthly limit of two. Their total rank of six fits the full-contract remaining allowance of twenty.
Figure 9 Six IC drafts selected with a monthly limit of two
Confirm acceptance and completion
After submitting, confirm that the models appear in the requested / in creation list. Download completed models from the Download page.
Distinguish a saved draft, a submitted create request and a completed model available for download.
Rank and quota
The candidate count in Drafts differs from the number selected for this request. Create-request usage is calculated from the selected models’ total rank[12]. In the example above, three models with ranks 1, 2 and 1 require an allowance of 4.
Before submitting, check the allowance[8] for the applicable request category and simulator. Monthly limits remain displayed, but do not prevent a create request. The selected total rank must fit the remaining allowance for the full contract period. A shared quota[13] is common to the covered environments; the remaining amount shown in each environment is not a separate allowance. Check download limits and remaining counts on Download, and create-request limits and remaining amounts on Request.
Figure 10 Download and creation allowances in Usage history
Open Usage history to check the subscription ID, contract period, maximum users, supported simulators, default pin assignment[19] and download / create allowances.
Select This month[14] or All time[15] under Period. The active period is shown in the selection field. This month follows the contract start date. For example, a contract starting on October 15 has a first month from October 15 to November 14; history counts usage up to the current day within that interval. The simulator is a separate filter.
A receipt, completed generation and download are different states. A receipt row alone does not prove that an artifact was downloaded or quota consumed. Visible history depends on contract and access rights.
History initially shows all periods for the selected subscription. Select All linked subscriptions to include past contracts linked to your account. If no current subscription is selected, the most recent linked past contract is selected instead. Select a subscription ID to narrow the list.
An ended subscription remains readable while its account mapping is retained. History from unlinked subscriptions is excluded, even within the same site. Acquisition permissions still follow the current contract.
Period, user, type, simulator and search filters are also available.
Print / Save PDF prints all matching history in portrait A4 from the same page, using the Usage history page URL within this environment. Reports are omitted from print. Downloads include acquisitions after pin-assignment changes; ranks apply only to creation requests.
Figure 11 Usage history
Page size and Search history are beside the result count. All simulators includes all simulators available in the selected contract.
7. Manage your account
Review and edit My page
My page shows your Site ID / Subscription ID and user / account information. Select Edit to change your name, company, department or phone details. Follow the displayed requirements when changing a password, then sign in with the updated information.
Check the completion message after making a change. For actions that send a notification email, check the registered email address.
Figure 12 My page
Notifications and model news
Open Notice to view unread notifications. Check the message, time and model, and use Mark as read for the item to remove it. Mark all as read marks all unread notifications as read. Named links such as Open Downloads open the indicated page. Show new notifications reloads notifications; Load older notifications loads older unread items.
View newly registered models
Announcements and Latest information remain visible while you scroll the inbox. They appear beside the inbox on desktop and below it on narrow screens. Latest information opens the model-update list and its monthly PDFs. Dates in the announcements indicate when those notices were published.
Include the following in your enquiry: Site ID and subscription ID Part number and operation time Receipt ID[16] or the Request ID shown on screen[17] (IDs are optional)
Pin assignment changes are available when included in your contract. Check the supported simulators, models and allowance before proceeding.
Datasheet pin order[18] may differ from SPICE pin order[18]. Check the model report and pin assignment when obtaining a model.
Supported models display setting, edit and change controls in the Pin assignment[19] column. Availability depends on the model and your contract.
Figure 18 Pin assignment controls
Choose SPICE compliant (for Zuken CAD)[20] or Custom[21] in the target row.
For Custom, open Edit in that row, enter the pin mapping and save it. Saving alone does not start generation. Follow the pin range and duplicate checks.
Select the change button in the same row. Check the target and settings in the confirmation dialog before submitting.
Check the receipt ID[16] and progress. After completion, refresh the list and select the artifact to download.
Table 3 Example mapping for a three-pin device
Datasheet pin
Terminal
Model connection order
1
B (base)
2nd
2
E (emitter)
3rd
3
C (collector)
1st
Table 4 From pin assignment choice to download
Required mapping
Action
Check afterwards
Datasheet mapping
Proceed with the normal download
Check pin mappings in the ZIP
SPICE mapping
Select in the target row → Change pin assignment → Submit
Check acceptance and generation, then download
Custom mapping
Save mappings in Edit → Submit the change in the same row
Saving alone does not generate the model. Download after completion
Terminal name and Datasheet are reference columns. Check the registered terminal names and enter the new pin numbers in Custom. A dash indicates an unregistered terminal name.
Figure 19 Edit pin mappings
Figure 20 Confirm submission
After submission
After you select Send and the request is accepted, a progress panel appears between the search/action toolbar and the model list on the Download page. The following examples enlarge that panel. Its status updates automatically. When Ready to download appears, generation has completed but the file has not yet been downloaded. Select the model in the list and download it. The panel is hidden when you first open the page.
Figure 21 After acceptanceFigure 22 After generation completes